Well, Christmas is just around the corner and I'm still making more Christmas ornaments. Maybe I'll stop once Christmas is actually over ... maybe. For these ornaments, I used plain, clear balls and filled each one with something different.
For the first ornament, I filled it with small pieces of yarn cut into different lengths. I used 6 different colours. After I cut the pieces, I simply placed them in the opening at the top. Once it was full, I replaced the top piece. I think this was the easiest ornament I have ever created!
For the second ornament, I put little snow flakes in it. Of course they are fake, but they are still very pretty and enjoyable! I only filled the ornament partway, but you could fill it to the top and have even more snow flakes to enjoy!
For the third ornament, I used a scrapbooking punch and four different coloured sheets of paper. After I punched out the design several times from each sheet, I put the punched out spiral shaped pieces in the little ball. For this one, I again choose to fill the ornament partway. I think it makes the spirals stand out more.
There are lots of different things you can use to fill the ornaments with, so feel free to experiment and try something new. Happy Holidays!
Thursday, December 17, 2009
Tuesday, December 1, 2009
Busy Making Christmas Ornaments
I can't believe that it is December already! I don't know where the time is going. Of course, I say this every year, so I should be used to this feeling by now!
With December here that means Christmas is just around the corner. I've already received my first Christmas card of the year ... you know Christmas is near when you start to receive Christmas cards!
I have started getting ready for Christmas by making a few ornaments. Here are pictures of two of the ornaments I made:
The best thing about these ornaments is that they are made from fabric. Not only are they easy to make, but also I don't have to worry about them breaking if the tree ever fell over. For anyone with small kids or pets, you know how easy that can happen.
I also love the little loop made from ribbon, which makes the ornament so easy to hang on the Christmas tree. No more having to stop and look for those little hooks. Now I just have to decide if I will make more of these ornaments in the same fabric or in a different colour. Hmm, what do you think?
If you would like to know how to make these ornaments yourself, please visit my website Beautiful Creations and check out the Christmas Present Ornament and the Christmas Star Ornament free project idea pages. Enjoy!
Monday, November 23, 2009
Book review of "Material Obsession"
Today's blog is a book review of "Material Obsession – Modern Quilts with Traditional Roots" by Kathy Doughty and Sarah Fielke. Kathy and Sarah are the owners of a quilting shop, named "Material Obsession", located in Sydney, Australia. This book is a story told through pictures of the beautiful quilts they designed, with lots of helpful tips for everyone.
It starts with an introduction by Kathy and Sarah themselves. They explain their approach to quilting, how they pick the colours to use in their quilts, where they get their inspiration and more. The introduction makes you feel like you've known the authors for years and that you are close friends with them.
The next section of the book is of course, the projects! They give the project instructions for 23 projects that Kathy and Sarah designed. The quilts are arranged by level of difficulty from easy to intermediate to advanced. The easy quilts have only a few pieces to cut out and assemble together. The more advanced quilts have several pieces to cut (don't worry, the templates needed to cut the shapes out are included) and give step-by-step instructions with lots of pictures on how to put it all together.
Throughout the whole book, Kathy and Sarah tell where they got the inspiration for a particular design and they also share ideas of how other quilters can modify the projects to suit their tastes. They encourage the reader to try different options and to have fun with the process.
Finally, the book ends with a section on quilting basics. It explains the different materials and supplies needed to make a quilt and how to choose these supplies. Then the section goes on to show different techniques, including how to properly cut fabric in different shapes and sizes; various applique techniques; how to piece the quilt together; how to layout and assemble the quilt; and ends with some notes on quilting and binding. There are hints and tips a plenty in this section to help you get the most from your quilting experience.
I think my favourite part of the book is reading all their stories of how the quilts came to be. Or is it the colours they used in the quilts ... I can't decide!
One of the things the book talks about is how to choose your fabric, especially the colours of the fabric. One method that Kathy and Sarah shared in their book for choosing colours, was to choose one central colour and then build from there with either contrasting or complementary colours. Want to get started thinking about your colour scheme? Then please visit Beautiful Creations to look at just some of the colours you could use in your next quilt!
Happy quilting!
Thursday, November 12, 2009
More Card Ideas
Remember my blog post about the book review of "The Encyclopedia of Greeting Card Tools & Techniques"? Well, it inspired me to create some of my own cards, which was a lot of fun. Here's some pictures of the cards I finished.
For Christmas, I made this card, which I call Snowflakes for Christmas. For this card, I used a paint brush to splatter paint on the card to form the background. But I think I'm going to have trouble deciding who to give it to ... any suggestions?
This one I call Seashell Wishes. I think I'll use it for a birthday card – especially a summer birthday. For this card, I was playing with oil pastels, making me feel like a kid again. I didn't have to worry about how pretty the picture was going to look – I just scribbled the pastels wherever I liked! Then, I just blended all the colours together. To finish it off, I used a black marker to trace a stencil on top of the colours. Fun and it turned out so pretty!
Here's one I created for New Year's celebrations. I'm really happy with how the colour turned out because blue is my favourite colour. For this card, I used oil pastels again, since it was so much fun when I did the Seashell Wishes card. I also added a ribbon to add that finishing touch.
If you would like to see more about these cards and other ones that I have made, please visit my Card Ideas webpage. Enjoy!
Thursday, November 5, 2009
My Knitting Adventures
The past month has been a busy one, filled with lots of company. My mom came from BC to visit me for a month and while she was here, my cousin also came to visit. We did some site seeing and shopping of course, but we also did a lot of knitting. And talking. It was like our own little family bitch and stitch!
Along with knitting, we went to a few local yarn shops in Toronto. One was Lettuce Knit near Spadina and College. It was a tiny shop, but very cute and had a lot of yarn. A few of the patterns had been knitted and were on display. It was nice to see the finished projects. My mom really liked a shawl that was on display and bought the pattern and yarn for it. My cousin found a Debbie Bliss magazine that she had been looking for.
The next store that we went to was Romni Wool, near Queen and Bathurst. That store was huge! One wall had shelves filled with knitting magazines and books, plus there was a ton of yarn. If you ever get the chance to go, make sure to check out the basement, where they have discontinued yarns on sale. My cousin found some lovely wool in the basement sale section and quickly snatched it up. As for myself, I couldn't quite decide on what to get because there was so much to choose from. I will definitely have to make a trip back there ... once I have a pattern in mind and know how much I need to buy.
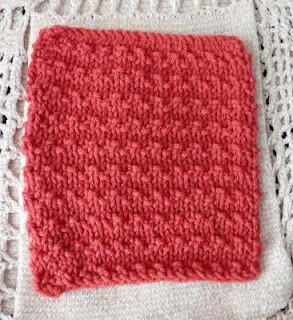
Here are a few of the things that my mom and I knitted. My favourite is the blue scarf - it has a very lacy look to it that I just love!
If you would like to see the patterns and instructions for the projects that my mom and I did, you can find them on my website – Beautiful Creations Knitting Projects. What projects have you knitted lately?
Thursday, October 22, 2009
My Favourite Cross Stitch Tips
Cross stitching is a very relaxing hobby. It's wonderful to see a pattern come to life as you complete each stitch and to show off your work when you are done. But while it may be easy to learn, there are some tricks and tips that can help you to make your cross stitching look the best it can! Here's some of my favourite tips:
- Use magnets. They are a great way to keep track of your needles and ensure that you don't loose them in between thread changes. Plus, if you do drop your needle, just sweep the magnet over the area and it'll find your magnet for you!
- Keep thread lengths short. It's easy for thread to become tangled, but if you use shorter lengths they won't tangle as often. Another added benefit is that the thread will look neater. That's because each time you pull the thread through the fabric, it starts to wear out. The less number of times that you pull it through the fabric, the less it'll wear out and the better it will look.
- Use hoops or roll your fabric. The best way to remove creases from your fabric is by preventing them to begin with. The key is to not fold the fabric. You can use a hoop when stitching or roll the side up so that the fabric doesn't get any creases in it. Just make sure to remove the hoop when you have finished stitching for the day, otherwise the hoop will crease the fabric.
- Use cold water. If your needlework does become dirty while you are working on it, simply pour some cold water and Ivory dishwashing liquid in a flat pan. Soak your needlework until the dirt comes off and then gently rinse it under cold water. Never scrub or wrinkle your needlework, otherwise you could damage it. Finally, lay the needlework out flat to allow it to dry.
Tuesday, October 13, 2009
Book review of "The Encyclopedia of Greeting Card Tools & Techniques"
Today's blog is a book review of "The Encyclopedia of Greeting Card Tools & Techniques" by Susan Pickering Rothamel. This book starts off with the history of greeting cards, followed by a demonstration of many different techniques in alphabetical order. It ends with several tables, followed by a few pages of quotations and popular sentiments that can be used for different holidays and occasions.
This book is truly an encyclopedia because it has over 250 pages of techniques, with colourful pictures on every page. It fully explains the technique, how to do it and gives tips on working with the various materials described.
As for the tables, each one contains useful knowledge. One table lists the different holidays around the world. Another table shows the different greetings that are used at Christmas by countries around the world. Finally, there is even a metric conversion chart table.
For me, the best part of the book is all the pictures. Not only can you see what the finished project looks like, but also you can see how easy it is to do. Hmm, now I am feeling very inspired, so I think I will go and create some greeting cards that I can send out for birthdays and other occasions that are coming up soon.
I hope this book will inspire you just as much as it has inspired me. If you would like to see some of the cards that I have created, please visit my website Beautiful Creations. Here you will find a picture of each card and a brief story of how I created each one.
Tuesday, October 6, 2009
Halloween Treat Bag
Wow, I can't believe that it is October already! Where has this year gone? Of course, since it is October, that means it will soon be Halloween.
Halloween is so much fun. Whether you take the kids out to go trick or treating or you stay home to hand out the candy, it's a blast to see them all dressed up! Last year my husband insisted on playing some scary music and the really little kids were so scared. And knowing him, he'll probably insist on playing it again.
Either way, the kids need something to hold all their candy. I've just the thing – a Halloween treat bag! Plus, it's quick and easy to make. Here's how. We'll be making the bag from a single piece of fabric, which we'll fold in half at the bottom of the bag and then sew the sides together.
To get started, cut your material to the desired size. Place it on your sewing table with the wrong side facing up. Lay your cord along one of the edges that will form the top of the bag and fold the fabric over the cord. Sew the cord in place, using a honeycomb stitch. Next, loop the cord around to the other edge that will also form the top of the bag and sew it in place.
Now that the cord is in place, fold the fabric in half with the right side facing in. Next, sew the sides together. Finally, turn the Halloween treat bag inside out and you're finished! Your kids will now have a one of a kind treat bag for when they go trick or treating. Happy Halloween!
If you liked this project, you can find more FREE Project Ideas on my website. Try them out and leave a comment on my blog - I'd love to hear from you!
Tuesday, September 29, 2009
Finishing Latch Hook Rugs As Pillows
Latch hook rugs are so fun to do, but it took me a while to figure out how to finish them. Part of it was trying to figure out what I wanted to make the latch hook rug into – a rug, a pillow cushion or a wall hanging.
I finally choose to finish one of my latch hook rugs as a pillow cushion. Here's what I did. After finishing the latch hook rug, I trimmed off the excess canvas, leaving 4 empty rows to work with. Next, I measured the latch hook rug and added 4 inches to the length and width. I used these new measurements to cut a piece of fabric for the backing.
Once I was ready to attach the fabric to the latch hook rug, I folded the edges of the fabric over 3/4 of an inch. I then pinned the fabric to the latch hook rug, making sure to match up the right sides of both the material and the rug together. Once that was done, I sewed the two pieces together by hand, placing one stitch in every square on the latch hook canvas.
After I had sewn together three of the edges (I left one of the sides unstitched), I turned the piece inside out. I filled it with stuffing, until the pillow was soft and fluffy. Finally, I sewed the remaining side shut, being careful to keep the edges tucked in. Now my latch hook pillow is happily on display on a chair in my living room!
If you liked this project, you can find more FREE Project Ideas on my website. Try them out and leave a comment on my blog - I'd love to hear from you!
Tuesday, September 22, 2009
Receiving Handmade Gifts
Last week I talked about how I love to give handmade gifts to people. But you know what? I also love receiving handmade gifts! I feel that if someone has taken the time to make me something, then they really care about me. I cherish that feeling and the gift.
I think the handmade gifts that I treasure the most are from my parents. My mom loves to quilt and has made me quite a few quilts over the years. They're better than anything I could buy in a store. And yes mom, I even loved the baby quilt that you made for me years ago – despite the fact that I didn't even have a boyfriend at the time! Hmm, no pressure there, really. :-)
Quite a few years ago, my dad started into woodworking. At first, he made his own picture frames – to showcase photos he had taken – and then he slowly started making furniture. The first piece he ever made for me was a bookshelf that I took with me to university. Since then, he has made me a coffee table, wood bowls and wood vases. I love showing them off to friends when they come to visit and everyone agrees that my dad should have done this for a living!
What are some of your favourite handmade gifts that you have received and why?
Tuesday, September 15, 2009
Making Gifts For Others
One of the things that I love about crafting is making gifts for other people. I love seeing their reaction. It's easy to buy something, but it takes a bit of effort to make something for someone.
I think the reaction I love the most is seeing the delight in their eyes when I give something that has been customized just for them.
For example, when my friend Vicki got married, she had a harpist play during the ceremony. She loved the music and given her musical background, this was very important to her. So, I designed a cross stitch wedding announcement that featured a harp. She loved it, especially the harp! Plus, the fact that she was so appreciative of it made my day!
I have cross stitched a lot of gifts over the years, including wedding announcements for friends and pictures for my mom. Not only do I love seeing their reaction, but I also love when I see my handiwork displayed in their house. I love it when I go to a friend's house and noticed that they have hung the wedding announcement I cross stitched for them up on the wall.
I especially love it when they show my cross stitching to others. My dad never really understood the whole cross stitch thing, until I had one framed for my mom and she hung it up. Now, whenever they have guests over, my dad proudly shows off my cross stitching! It's such a great feeling!
What things have you made for others and what was their reaction?
Tuesday, September 8, 2009
Knitting Is The New Yoga
A recent article in the Daily Express talks about how one company in the UK has organized a new initiative – knitting at lunch time – to help reduce stress.
The article reports "Health officials have concluded that knitting is an ideal way to combat work stress. Under a new initiative, workers at NHS Highland have been bonding over balls of wool at lunch, instead of grabbing a rushed sandwich at their desk. Organiser Fiona Clarke, health promotion specialist at NHS Highland, described knitting as "the new yoga". She said: "Every knitter knows it is good for you because it really calms you down and de-stresses.""
Many people these days feel that taking a break is a waste of time. Perhaps they feel that there is so much work to do, that it just won't get done if they stop for even 1/2 hour. However, working without breaks can leave people feeling tired and prone to making mistakes.
Personally, I have come to realize over the years that I need breaks. Not only do I feel refreshed, but I feel more focused and I'm able to concentrate on the task at hand. So, instead of breaks delaying me, they actually help me to be more productive.
Sometimes my breaks mean working on some repetitive tasks that don't require much thinking (it feels really good to cross them off my to do list), but other times it means going for a walk, knitting or chatting with a friend for a little bit. I used to feel guilty about this, but now I realize that I'm a much better person and more productive because I take breaks.
What do you like to do on your break time?
Tuesday, September 1, 2009
A Brief History of Crazy Quilts
Crazy quilts are quilts that have random patches or scraps of fabric sewn together. Usually, there is no set pattern or colour scheme when creating a crazy quilt. Each piece of fabric has a unique shape and is added to the quilt one piece at a time by hand. Fancy embroidery stitches and embellishments are common on crazy quilts but the amount of detail added to each quilt can vary enormously.
Crazy quilts have been popular since the Victorian age, especially in North America where settlers had limited resources. They didn't always have new material to make blankets, so they pieced together scraps of fabric and the pieces of old clothing left over after the worn out parts were cut away. It didn't matter what type of fabric it was or its size, all fabric was precious and useful.
Then, in the 1880's, the popularity of crazy quilting exploded due to an art exhibit from Japan in 1876, at the Philadelphia Centennial Exposition. Patterns and embroidery on the quilts became much more elaborate and often had an Oriental theme or featured Japanese motifs, such as fans. However, the emphasis of crazy quilts was still on the embroidery stitches holding the fabric scraps together, along with the embellishments added to the patches.
By 1920, their popularity had faded and crazy quilts had taken on a simpler look. By this time, women began to think more about practicality than fashion or art when making their quilts. Crazy quilts had finally returned to their original purpose as a way to use up fabric scraps and old clothing.
To learn How to Make A Crazy Quilt, please visit my website, Beautiful Creations, where you will find step-by-step instructions and a full list of all the supplies you will need.
Tuesday, August 25, 2009
Creating A Cross Stitch Art Gallery
I have two walls in my house that are perfect for hanging up my cross stitch projects. They're perfect because they follow the staircase leading from the main floor to my second floor (so lots of wall space) and there are no windows (meaning no pesky direct sunlight to ruin the colours on the cross stitched pieces). So, I have purposely left those walls blank, just waiting for me to finish framing my cross stitch projects and hang them up.
Well, last week I finished framing two cross stitch projects. I put each one in a shadow box and hung them in a straight line. The cross stitch pieces look amazing in their frames and best of all, it looks like I have my very own art gallery in my house! I've decided that when I finish my current cross stitch project, I'll also frame it in a shadow box and hang it up on the other side. Then I'll really feel like I'm in an art gallery when I walk up the stairs.
In the past, I've used traditional picture frames for my cross stitch projects. But I always found that they were a bit of a pain. The frame never quite had enough room, especially if I had the cross stitching on a mounting board. But the shadow boxes had lots of room! Plus, the frame doesn't need to be fancy to have your work really stand out. With nothing else to distract people, the cross stitching is now the focus – just as it should be!
Please visit my website, Beautiful Creations, for more ideas on Framing Cross Stitch – where I show you ideas such as shadow boxes, hoops, pillows and much more!
Tuesday, August 18, 2009
Book Review of "Knits Three Ways"
Today's blog is a book review of "Knits Three Ways" by Melissa Matthay. This book takes 12 different patterns and does 3 variations for each pattern, to give you a total of 36 new and exciting designs. I love the fact that it shows you how a pattern can be modified to give a totally different look to the finished item, just by changing the yarn, the type of stitches used and/or the length of the item.
The book starts off with a note from the author, explaining how she came up with the idea for the book and what you will find in it. The next six pages are dedicated to teaching you how to design your own sweaters. If nothing else, it will give you the confidence to modify patterns so that you will end up with the sweater of your dreams.
The rest of the book contains twelve patterns, with three variations on each pattern. Even then, for each variation, the author explains how you can take elements from the other variations. For example, if you liked the neckline from one variation and the sleeves from the other variation, she’ll explain how to combine those elements into the pattern you're looking at.
Myself, I will be trying out the v-neck cardigan, using the "Tracy" variation. I almost passed this pattern over, until I realized that it was the yarn I didn't like. The pattern is what I have been searching for – a simple cardigan. Now I have the confidence to change the yarn type and go for it!
Visit Beautiful Creations for more knitting and crochet books with exciting and bold patterns. Happy knitting!
Monday, August 10, 2009
Having Fun in a Power Outage
Last night we had the worst thunderstorm in years. I was sitting on my porch and watched as this dark cloud quickly moved my way. As soon as the dark cloud reached my house, it went from sprinkling rain to gusting winds and heavy rains in less than a minute. The resulting lightning storm was amazing to watch, with new lightning strikes almost every minute. Along with the wind, rain and lightning, the power went out.
The storm produced such strong winds that they knocked down several hydro poles on a nearby street, plunging several blocks into darkness. Of course, not knowing the cause of the power outage, my neighbours and I prepared to wait it out. My neighbours invited my husband and I to come over for a visit. So, we sat in the living room with only candles on the table and shelves to light the room. We talked for a bit, laughed and had a good visit.
The highlight of the evening however, was our neighbour's five year old daughter entertaining us with her dance routine. Her mom shone a flashlight on her, as if it was the spotlight on a stage and introduced her to the "crowd". I provided the music and we all watched her dance. At the end of every dance routine, we all clapped and shouted "Bravo"!
It was a fun evening and all because of a thunderstorm. I'm just hoping that the next time we get together, it's not because of a power outage!
Monday, July 27, 2009
Fabric Covered Organizer
Last week, I blogged about how to get your creative juices flowing. Then, I went and took my own advice. So, this week I wanted to let you know what I had worked on.
I decided to pretty up my environment by covering a plain, plastic organizer with fabric. It was pretty easy to do and the final project looks so cute! Here's the Before and After Pictures:
Here's what I used:
For the sides, I cut four strips of felt. I cut the strips for the sides slightly shorter than the length and the strips for the front and back a bit longer than the width of the organizer. That's because I wanted to wrap the front and back strips around the side. Once the strips were cut, I sprayed the back of them with the spray adhesive. Then I put the side strips of first, followed by the front and back strips.
Next, I focused on the top of the organizer. I cut one piece of cotton fabric so that it was a few inches wider and longer than the top. Then I sprayed the fabric with the spray adhesive, positioned it on the center of the lid, pressed down and tucked the edges underneath the lid. This gives the lid a nice finished look and since the material is thin, the lid can still close easily.
Finally, I glued some paper flowers on the front of the organizer. The flowers match colours found in the cotton fabric, so that everything is coordinated. Best of all, the black felt really makes the colours in the fabric pop out! Now, instead of having plain organizers, I have bright, colourful ones that add extra cheer to the shelf in my office.
For more ideas to help brighten up your working environment, check out these great Project Ideas on my website.
I decided to pretty up my environment by covering a plain, plastic organizer with fabric. It was pretty easy to do and the final project looks so cute! Here's the Before and After Pictures:
Here's what I used:
- Plastic Organizer;
- Fabric;
- Embellishments;
- Spray adhesive;
- Measuring tape; and
- Scissors.
For the sides, I cut four strips of felt. I cut the strips for the sides slightly shorter than the length and the strips for the front and back a bit longer than the width of the organizer. That's because I wanted to wrap the front and back strips around the side. Once the strips were cut, I sprayed the back of them with the spray adhesive. Then I put the side strips of first, followed by the front and back strips.
Next, I focused on the top of the organizer. I cut one piece of cotton fabric so that it was a few inches wider and longer than the top. Then I sprayed the fabric with the spray adhesive, positioned it on the center of the lid, pressed down and tucked the edges underneath the lid. This gives the lid a nice finished look and since the material is thin, the lid can still close easily.
Finally, I glued some paper flowers on the front of the organizer. The flowers match colours found in the cotton fabric, so that everything is coordinated. Best of all, the black felt really makes the colours in the fabric pop out! Now, instead of having plain organizers, I have bright, colourful ones that add extra cheer to the shelf in my office.
For more ideas to help brighten up your working environment, check out these great Project Ideas on my website.
Wednesday, July 22, 2009
How To Get Your Creative Juices Flowing
Webster's online dictionary defines creativity as "The ability to create something new. We can define creativity as innovation, particularly in artistic endeavours and writing". For some people, creating something new seems so effortless. But if you're like most people, you have to work at it.
And then there are those times where you feel stuck or blocked and nothing happens. You want to create something, but you don't know what. If you feel like your creative juices just aren't flowing (and we have all been there at one point or another), then here are some things that can help them to get moving:
- Be open to new ideas. Try something new. If you never try it, how do you know if you will like it or not. By trying it once, you just might find a hidden passion you never knew was missing!
- Keep at it. The reason is simple - the more you create, the more creative you'll become. It's easy to put things off – you always mean to do something, but you just never quite get around to it. So, make time for it. Even if it's just 30 minutes once a week, by yourself or with others, put a creative activity in your schedule. Make a plan and stick to it.
- Experiment. Try using a different colour than the pattern calls for and just see what happens. You'll learn from the experience and gain confidence to try something new or different next time!
- Don't worry about perfection. Kids are always creating something new – drawing, painting or anything else they can get their hands on. They don't worry about how it turns out. If they like, they keep it. If they don't, they just laugh and move on. It's a great attitude to have because the less you worry, the more you'll enjoy the creative process.
- Make your environment more creative. It doesn't matter where you spend your time, if you are surrounded by creativity, you'll feel more creative. Even a boring cubicle can be dressed up. For example, add some colourful fabric on the cubicle wall or put a small doll by your monitor.
- Look for sources of inspiration and creativity. Go to museums or even look through magazines. Take note of the things that capture your attention and why. Do you like the colours of the object or does it bring back pleasant memories? By thinking about it, you'll get back in touch with your own creative abilities.
Tuesday, July 14, 2009
Creativity Is A Mindset
This week I wanted to continue on the theme of creativity. A big part of being creative is thinking you're creative. That is, it's all in your mindset, your way of thinking. If you think you are creative, you will be. If you don't think you're creative, then you won't be.
So, I figure if I'm on a quest to help re-build my imagination and creative juices, then I had better get in the right frame of mind from the start. There's probably lots of ways to get there, but I choose to come up with a creativity bio.
A creativity bio is a short summary of who you are, it's witty and includes a statement about being creative.
Do you want to write up your very own creativity bio? First, start by thinking about what you want to put in your bio. Include things like:
Here's how my creativity bio turned out:
Joanne Jones is a small country girl who moved to the big city, even though she vowed she never would and now never wants to leave. However, she's still trying to search for the best of both worlds – nature and convenience – which to her means a paved path in the middle of a forest. She's always on the lookout for the next crafty project. She blames her mother for that because when she was a small child, her mom handed her a book filled with craft projects, some supplies and the rest as they say, was history. She's been hooked on crafts ever since! On a final note, you can usually recognize Joanne by the camera in her hand. She's always taking pictures, but only a small, select group of people will ever get to see them!
What would your creativity bio say about you?
So, I figure if I'm on a quest to help re-build my imagination and creative juices, then I had better get in the right frame of mind from the start. There's probably lots of ways to get there, but I choose to come up with a creativity bio.
A creativity bio is a short summary of who you are, it's witty and includes a statement about being creative.
Do you want to write up your very own creativity bio? First, start by thinking about what you want to put in your bio. Include things like:
- Humorous stories from your childhood;
- Where you grew up;
- How you ended up in the city you currently live in;
- Likes and dislikes;
- Any accomplishments;
- What's the most important goal you want to achieve;
- Different places you have lived or different jobs you have held; or
- Anything else that describes you!
Here's how my creativity bio turned out:
Joanne Jones is a small country girl who moved to the big city, even though she vowed she never would and now never wants to leave. However, she's still trying to search for the best of both worlds – nature and convenience – which to her means a paved path in the middle of a forest. She's always on the lookout for the next crafty project. She blames her mother for that because when she was a small child, her mom handed her a book filled with craft projects, some supplies and the rest as they say, was history. She's been hooked on crafts ever since! On a final note, you can usually recognize Joanne by the camera in her hand. She's always taking pictures, but only a small, select group of people will ever get to see them!
What would your creativity bio say about you?
Wednesday, July 8, 2009
Finding Creativity
Do you ever think back to your childhood and remember some of your favourite things to do? Have you ever thought, wow, I was really creative as a kid?
As a kid, I could make anything out of play dough or building blocks. Or at least, that's how it seemed to me. But give me some now and I'm not quite sure what to make. I have to think about it before I can start creating something.
So, what happened? Did we just stop using our imagination? Or are we just using them in a different way? I think that as adults, we need to help give our imagination a boost from time to time. I'm on a quest to help re-build my imagination and creative juices. I'll be letting you know what I try and the results in future posts on my blog, so stay tuned.
For now, I'm trying to keep an open mind. I'm going to let my mind wander and see where it wants to go. I want to see what attracts my attention, follow it and see what happens.
Want to give a kick start to your creative juices? Then visit Beautiful Creations Craft Projects where you'll find lots of crafty ideas that will get your imagination going.
Tuesday, June 30, 2009
My Designer Profile
I am so excited!! I was recently interviewed by Connie G. Barwick, the About.com guide to cross stitching. Connie does profiles on various cross stitch designers and her latest one is about me! Yeah!
Here are a few of the things that Connie covered in her interview:
I always love reading Connie's profiles on cross stitch designers because it gives me a chance to learn a little bit more about them than I might learn otherwise. Plus, it has introduced me to so many different designers and some very unique patterns. It's so great to see all the imagination and creativity that is out there.
Who are some of your favourite cross stitch designers and why?
Here are a few of the things that Connie covered in her interview:
- How I got started,
- Where I find inspiration,
- What my favourite design is, and
- The photo conversion service that I offer.
I always love reading Connie's profiles on cross stitch designers because it gives me a chance to learn a little bit more about them than I might learn otherwise. Plus, it has introduced me to so many different designers and some very unique patterns. It's so great to see all the imagination and creativity that is out there.
Who are some of your favourite cross stitch designers and why?
Wednesday, June 24, 2009
Knitting Tips For Everyone
Experienced knitters make knitting look so easy ... but it takes a lot of practice and skill to reach that point. So, whether you're just starting out or if you've been knitting for a while, here are some tips that will help you out.
1. To sew buttons on a knitted garment, use elastic thread. It'll keep your button in place, plus it won't cut or fray the yarn around it – keeping your garment looking beautiful for a long, long time.
2. When knitting a sweater, don't bind off the shoulder stitches. Instead, leave the stitches on the needles or on stitch holders. Then, when all the pieces of the sweater have been knitted – front, back and sleeves – you can simply knit the pieces together. Once that's done, then you can bind off the stitches. The result – a smooth, flat seam that looks great!
3. To make sure that the pattern size of the sweater you're knitting will actually fit, compare it to the best fitting sweater in your closet. Measure the dimensions of the sweater, specifically the width and length of the sweater, along with the size of the armholes and the length of the sleeves. Compare these measurements to the dimensions listed on the knitting pattern and pick the size that matches up the best.
4. Finally, have fun knitting! It's the best way to ensure that you'll keep knitting and the more you knit, the better you'll get!
I hope that you have found these tips useful. Please visit my website Beautiful Creations for more helpful Tips & Info on Knitting.
Wednesday, June 17, 2009
Drawstring Bag Cross Stitch Project
A really easy cross stitch project to create is a drawstring bag. Not only is it beautiful, but it's practical. There are so many uses for a drawstring bag. You could fill it with potpourri, you could hang it on the wall, or you could use it to hold keepsakes or jewelry.
Here's how you can make your own drawstring bag:
1) First, determine the size that you want the drawstring bag to be. Then, pick a cross stitch pattern to stitch on the bag. Look for smaller patterns - they can go on the front of the bag or wrap around both sides.
2) Select the fabric to cross stitch on and cut to size. You will be stitching on one piece that will be folded in half, so it is important that you determine whether the pattern will go on the front only or wrap around to both the front and back. Once you have determined that, you can figure out how much fabric you will need. This is a great way to use up leftover scraps of aida fabric.
3) Once the aida cloth has been cut, go ahead and cross stitch the pattern as normal.
4) Prepare a drawstring for the top of the bag. You can buy one that is already made or you can create your own. To create your own, choose 3 colours of DMC floss - either colours that you used in the pattern or ones that compliment those colours. Braid the DMC floss together. Remember to use all 6 strands of DMC floss for each colour. The length of the floss should be twice as long as the fabric at the top of the drawstring bag, where the drawstring will be placed.
5) Now you are ready to attach the drawstring to the bag. Place the drawstring near the top of the bag on the wrong side. Turn the top of the bag over the braid and temporarily hold it in place with safety pins. Stitch the folded aida cloth in place by stitching little "x's" every few squares. If you like, try creating a pattern with your stitches.
6) The last step is to sew the drawstring bag together. First, fold the drawstring bag in half, with the wrong side showing out. The two sides should match up and the drawstring should be at the top. Starting from the top, backstitch the two sides together and continue until the bottom half is sew together. Be careful to leave about four to five squares on the outside of the stitch, so that the stitches won’t come loose and fall out. Once all the sides have been sewn together, except for the top of course, simply turn the bag inside out and you are done. It’s as simple as that!
If you liked this project, you can find more FREE Project Ideas on my website. Try them out and leave a comment on my blog - I'd love to hear from you!
Tuesday, June 9, 2009
Book Review of "Fast & Easy Scrapbook Pages"
Today's blog is a book review of "The Kodak Book of Fast & Easy Scrapbook Pages" by Kerry Arquette and Andrea Zocchi. This book presents 125 different layouts - grouped by layouts using one photo, layouts using two photos and layouts using three or more photos.
The book starts off with an introduction to scrapbooking, what you need to get started, design pointers and tips to keep all your supplies organized. This four page introduction is brief and to the point so that you can get what you came for - creating your scrapbook!
The next 85 pages of the book concentrate on showing you many, many different layouts. No two are alike and each one describes the key elements needed to make that layout work. There's tips a plenty - you'll learn how to create balance on a page; how to use headlines and journaling effectively; how to use colour to create a mood or theme on a page; and how to add embellishments without making the page cluttered. The book also shows you how to do different scrapbooking techniques like stamping, embossing, distressing, chalking and lacing.
In summary, this book is a great source of inspiration for scrapbook pages. Plus, for each layout that the book presents, it tells you what elements make that page work, so that you can make it work for you too!
Visit Beautiful Creations for great scrapbooking supplies that will inspire you when you start to work on your next scrapbook! If you're still looking for more inspiration, don't forget to check out our FREE scrapbook layouts. Happy scrapping!
Monday, June 1, 2009
Creating a Cross Stitch Journal
A cross stitch journal is an excellent way to keep track of all the great projects you have finished in the past. If you like, you can also keep track of the patterns you have bought, the projects that are a WIP (Work In Progress), your supplies and more. It's your journal – so you get to decide what you want to record and the level of detail you include.
There are two things that you have to decide on. First, decide how you will record the information. Do you want to use a binder, a blog, an online photo gallery, or record it digitally on a computer? Once you have decided on that, you will then have to figure out what you want to include in your journal.
Here are some things that you could include:
- Keep track of all your finished cross stitch projects. Include a picture, when you finished it, who it was made for, and any other details that you want to include.
- Your WIP projects. Take pictures of your each project as you work on it. Sometimes its nice to look back and see pictures of the progress you really are making. Plus, it's a great way to stay motivated and working on large projects.
- Write down all the supplies you have on hand. This will help you to avoid buying duplicates of supplies you already have.
- Finally, keep a page just for notes. You might want to record what cross stitch supplies you really liked working with or modifications you made to different patterns.
Friday, May 22, 2009
4 Squares Pin Cushion Project
Here's a great way to use leftover fabric scraps to create a pin cushion that can hold either your favourite pins and needles or that can hold the pins you will need while you are working on your latest sewing project.
Supplies Needed:
Layout the 4 small squares of fabric, so that one colour (we will call it Colour A) is placed in the top left hand corner and in the bottom right hand corner. The other colour (we will call it Colour B) should be placed with one square in the bottom left hand corner and one square in the top right hand corner.
Take one square of Colour A and one square of Colour B and place them with the right side together. Sew one edge together and set aside. Then, take the two remaining squares, place them right side together and sew one edge together. For both pieces that you have just sewn, unfold the pieces and lay them out flat. Place the pieces with the right side together, with Colour A facing Colour B. Finally, sew one of the long edges together. Unfold the fabric. You should now be looking at one square, made up of two different colours.
Please visit Beautiful Creations to read the remaining instructions and to see a picture of the completed project.
If you liked this project, you can find more free project ideas on my website. Try them out and leave a comment on my blog - I'd love to hear from you!
Supplies Needed:
- Fabric – choose 3 different colours;
- Stuffing;
- Thread;
- Scissors;
- Sewing Machine; and
- Button (optional).
Layout the 4 small squares of fabric, so that one colour (we will call it Colour A) is placed in the top left hand corner and in the bottom right hand corner. The other colour (we will call it Colour B) should be placed with one square in the bottom left hand corner and one square in the top right hand corner.
Take one square of Colour A and one square of Colour B and place them with the right side together. Sew one edge together and set aside. Then, take the two remaining squares, place them right side together and sew one edge together. For both pieces that you have just sewn, unfold the pieces and lay them out flat. Place the pieces with the right side together, with Colour A facing Colour B. Finally, sew one of the long edges together. Unfold the fabric. You should now be looking at one square, made up of two different colours.
Please visit Beautiful Creations to read the remaining instructions and to see a picture of the completed project.
If you liked this project, you can find more free project ideas on my website. Try them out and leave a comment on my blog - I'd love to hear from you!
Friday, May 15, 2009
Tips For Setting Up Your Craft Room
Here are some ways to help you get the most out of your craft room. These tips will help you save time finding supplies, so that you can spend more time working on your favourite crafts.
- To maximize your storage space, use all the space available to you and take advantage of unused spaces. For vertical spaces, use tall shelves. Use wall space by hanging up peg boards that can hold smaller supplies, like scissors or rulers. And don't forget about those hidden spaces, such as the space under tables. Rolling bins work great in these spots, where the bins can be tucked under the table and then rolled out when needed.
- Place the supplies you use the most in a place you can easily reach, without having to move other supplies out of the way. Place infrequently used supplies in harder to reach areas, such as the top of shelves or the back of the closet.
- Have a place for everything and keep it there. Take it out only when you need it and put it back once you are done with it. If you can't be bothered to put it back, then it needs to find a new spot – one that will make it easy for you to put supplies in. The whole point of keeping everything in its place is to keep your craft room neat and organized. If it becomes messy, it will annoy you and then you won't want to go in your wonderful craft room. Therefore, keep it neat to begin with so that you will enjoy working on your crafts.
Monday, May 4, 2009
Tips for Using Leftover Floss
Have you ever worked on a cross stitch kit and then had leftover floss once you finished the project? Maybe it was a little, but sometimes you can be left with a lot of floss. Did you wonder what you should do with this leftover floss from the kit? Most people just throw it out, thinking they will have no use for the floss. Instead, keep the floss because here are a few ways that you can use it in the future:
Before you go, leave a comment below to let me know what you do with your leftover floss.
- Use the floss to stitch names and dates on wedding or birth announcements.
- Put your initials and the date in the bottom corner to show when you completed the project.
- Use it for small cross stitch patterns, such as bookmarks, or on patterns that only use a small number of colours.
- Make braids and friendship bracelets or give the floss to a community center so the kids there can make friendship bracelets.
- If you run out of a colour on a project you are working on, you could substitute it for a similar colour from your stash of leftover floss.
- Change a colour in a pattern for one from your leftover floss stash to give the cross stitch pattern a fresh and unique look.
Before you go, leave a comment below to let me know what you do with your leftover floss.
Friday, April 24, 2009
Fabric Coffee Cup Holder Project
Have you ever bought a coffee from a coffee shop and the cup was too hot? What did you do? Well, here's a simple solution – make your very own fabric coffee cup holder. Use it instead of using napkins or another coffee cup. You'll reduce waste, help save the environment and keep your fingers cool all at the same time! Machine washable! Project is small enough that you can use left over fabric scraps.
Supplies Needed:
Before sewing, you should iron the fabric to smooth out any wrinkles. You will also need to prepare the bias. Simply fold the bias in half lengthwise and iron the edges together. This will help you when sewing the three layers together.
Now you are ready to begin sewing. Start by placing the layers together. Put one piece of fabric, wrong side facing up on a table. Over that piece, place the batting. Place the second piece of fabric, right side facing up, over the batting. If you like, you can pin the layers together. Next, line up the longer piece of bias with the top of the layers; the fold in the middle should be at the top. Place the three layers between the bias and pin in place. Do the same with the shorter piece of bias with the bottom of the layers.
Sew the top of the layers together, then sew the bottom and finally sew the sides together. Turn the fabric inside out and you are done! You have now made your very own fabric coffee cup holder. Use it to protect your fingers from hot, or cold, coffee cups.
If you liked this project, you can find more free project ideas on my website. Try them out and leave a comment on my blog - I'd love to hear from you!
Supplies Needed:
- Thread;
- Sewing machine;
- Fabric;
- Wide single fold bias;
- Batting;
- Pins;
- Scissors;
- Iron; and
- Fabric pencil (optional).
Before sewing, you should iron the fabric to smooth out any wrinkles. You will also need to prepare the bias. Simply fold the bias in half lengthwise and iron the edges together. This will help you when sewing the three layers together.
Now you are ready to begin sewing. Start by placing the layers together. Put one piece of fabric, wrong side facing up on a table. Over that piece, place the batting. Place the second piece of fabric, right side facing up, over the batting. If you like, you can pin the layers together. Next, line up the longer piece of bias with the top of the layers; the fold in the middle should be at the top. Place the three layers between the bias and pin in place. Do the same with the shorter piece of bias with the bottom of the layers.
Sew the top of the layers together, then sew the bottom and finally sew the sides together. Turn the fabric inside out and you are done! You have now made your very own fabric coffee cup holder. Use it to protect your fingers from hot, or cold, coffee cups.
If you liked this project, you can find more free project ideas on my website. Try them out and leave a comment on my blog - I'd love to hear from you!
Friday, April 17, 2009
Family Seashell Magnet Project
Summer is approaching us very fast! Before you know it, the hot weather will be here and the kids will need something to do. Why not a trip to the beach? It's fun for everyone and will create memories that will last a lifetime.
To help keep those memories alive, here's a project that uses seashells as a great way to remember the family outing to the beach every time you look at the fridge. It's so simple that everyone in the family can take part.
Supplies Needed:
Next, gather your supplies together in one spot. Using your hot glue gun, put a small dab of glue on the magnet. Quickly put one seashell or stone on the magnet, while the glue is still hot. Press the stone into place. Presto! You have now finished your memento of the family outing to the beach. Put it on the fridge so that you can remember and think about your trip every time you look at the seashell or stone.
If you liked this project, you can find more free project ideas on my website. Try them out and leave a comment on my blog - I'd love to hear from you!
To help keep those memories alive, here's a project that uses seashells as a great way to remember the family outing to the beach every time you look at the fridge. It's so simple that everyone in the family can take part.
Supplies Needed:
- Hot glue gun,
- Seashells or stones collected from the beach, and
- Small magnet.
Next, gather your supplies together in one spot. Using your hot glue gun, put a small dab of glue on the magnet. Quickly put one seashell or stone on the magnet, while the glue is still hot. Press the stone into place. Presto! You have now finished your memento of the family outing to the beach. Put it on the fridge so that you can remember and think about your trip every time you look at the seashell or stone.
If you liked this project, you can find more free project ideas on my website. Try them out and leave a comment on my blog - I'd love to hear from you!
Friday, April 10, 2009
Knitting In The News
Knitting is very popular and occasionally it even makes it into the news. Here are some knitting items that happened this week.
After the devastating earthquake in L'Aquila, Italy, there was some good news when a 98-year-old woman was found alive. She had been trapped under her bed when her house collapsed during the earthquake. Rescuers found her 30 hours after the earthquake hit. So, how did she spend her time while waiting to be rescued? By knitting and crocheting!
Or how about this for originality? One teenager in Texas knitted her own prom dress – out of coloured duct tape! And her date also made his own suit out of duct tape. She simply rolled the duct tape into a string and then knitted with it. Watch the video on CNN to see how she made her dress. Now that's being crafty!
Do you have your own crafty story that you think should make the news? Write about it below and who knows? Maybe it will!
Friday, April 3, 2009
Reusing Ordinary Items In Scrapbooks
Today I'm passing on a tip that will help you to save money when scrapbooking and to be environmentally friendly at the same time. The tip is all about how you can reduce waste by reusing items instead of throwing them out. Plus, since you are reusing, that means you have one less thing to buy and that saves you money.
So here are some items that you can reuse:
Want more? Then please visit Beautiful Creations for more recycling ideas and other helpful scrapbooking tips.
So here are some items that you can reuse:
- Reuse wrapping paper from Christmas and birthday presents as background paper. It's colourful and if there are any spots that are badly damaged, you can always cover them up!
- Use leftover embroidery thread to create braids to form borders or to frame pictures on your scrapbook page.
- Create pockets from old clothes or scraps of fabric. The pockets can then be used to hold anything that you don't want to permanently attach to your scrapbook.
- Use leftover or spare buttons as embellishments. Damaged buttons will work too because you can always glue them to the page.
Want more? Then please visit Beautiful Creations for more recycling ideas and other helpful scrapbooking tips.
Friday, March 27, 2009
Scented Cross Stitch Floss
DMC has just come out with a brand new line of floss for cross stitching – and it's scented! The line is called "Secret Perfume" and only has 12 different colours and scents. The 12 floss colours are divided into three different groups:
Personally, I'm not a perfume lover and I may actually be allergic to perfume. But, I think I would probably have to try this new scented floss at least once. Just to see what it's like. How about you? Let me know by placing a comment below, or go to the About.com Guide to Cross Stitch and place your vote on “Would You Choose to Stitch With Scented Floss?”
- Flower Bouquet, which features four different flowery scents;
- Tutti-Frutti, which features four different citrus fruits scents; and
- Delicacies, which features four different desert flavoured scents.
Personally, I'm not a perfume lover and I may actually be allergic to perfume. But, I think I would probably have to try this new scented floss at least once. Just to see what it's like. How about you? Let me know by placing a comment below, or go to the About.com Guide to Cross Stitch and place your vote on “Would You Choose to Stitch With Scented Floss?”
Friday, March 20, 2009
Fabric Covered Magnets Project
Have you ever received a mini calendar in the mail? You know the kind that has a magnet at the top of the calendar with an ad for a real estate agent or dentist. What do you do with the magnet once the calendar year has finished?
Well, I've come up with a project that's the perfect way to recycle those magnets so that you don't have to throw them out in the garbage. It's a really simple project and it's really fast to complete! It's my Fabric Covered Magnet project.
Take a magnet from a mini calendar and tear off the calendar and the ad covering the magnet. Cut a piece of fabric slightly larger than the magnet. Using spray adhesive, glue the fabric to the magnet. Turn it over and spray the edges of the fabric. Fold the edges of the fabric over the magnet to create smooth edges. Your recycled magnet is now finished! Put it on your fridge and let it brighten your day every time you see it!
If you liked this project, you can find more free project ideas on my website. Try them out and leave a comment on my blog - I'd love to hear from you!
Friday, March 13, 2009
How To Make Your Own Craft Stiffener
Craft stiffener is an excellent way to make your crafts retain a specific shape over time, especially crochet projects. You can either buy stiffener from a craft store or you can make your own from sugar and water. It's very easy. Simply mix together one part water and one part sugar in a small pot. Stir the sugar until it has completely dissolved. Next, bring the mixture to a boil and then remove it from the heat.
Allow the mixture to cool a little and then dip your crochet project in it. Remove it from the mixture and use paper towels to soak up the excess moisture. Use Styrofoam or plastic containers to help you mold it into the desired shape and allow it to dry. Your craft project will now hold that shape permanently.
I hope you have found this tip useful. If you use it for any of your craft projects, crochet or other, please leave a comment below. I'd love to hear about what projects you are working on. For more helpful crochet tips and tricks, please visit Top 7 Crochet Tips today!
Friday, March 6, 2009
Free Baby Snake Doll Pattern
Are you looking for a project to do with the kids on a rainy weekend? Well, look no farther because I have the thing just for you. Here is a pattern to make a baby snake doll - and best of all, it's quick and easy to do!
Go to my website, Beautiful Creations, and print off the PDF file that contains the doll pattern. Then cut out both shapes. Either pin or trace the shapes onto the fabric and cut the shapes out.
If you want, cut out a thin short strip of felt to use for the tongue. Leave one end of the felt straight and cut a "V" into the other end. Next, place the right side of both pieces together and position the tongue at the front of the snake. Make sure that the tongue is placed between the two pieces and that the edge of the tongue is lined up with the edge of the material. Then sew the pieces together, leaving one end open.
Turn the snake doll inside out. Stuff it with loose batting, until the desired puffiness has been reached. Once you are happy with how the doll looks, sew the open end shut. Finally, place one rolly eye on each side of the snake's head. You now have made your very own baby snake doll!
If you liked this project, you can find more free project ideas on my website. Try them out and leave a comment on my blog - I'd love to hear from you!
Friday, February 27, 2009
How To Make Small Designs Larger
Free patterns are great, but sometimes they can be a little small. There are two ways that you can make the design bigger, without changing it.
The first way is to select an aida cloth with a smaller count. For example, if you switch from a 14 count aida cloth to an 11 count, your design will be instantly larger! A 5 x 7 design on 14 count now becomes 6 x 9 inches on 11 count.
The second way will make your design even larger. Keep the 14 count aida cloth, but instead of placing your stitch on one square, place it over 4 squares. Be sure not to stitch the middle hole, so that you don't change the look of the design. This method is similar to stitching on linen cloth. Now, your 5 x 7 design now becomes 10 x 14 inches. With no extra work on your part, your finished piece is now twice the size!
Happy stitching!
Thursday, February 19, 2009
Why You Should Do Crafts During A Recession
Many people's first instinct when talking about the recession is to stop spending money. However, as long as you have money coming in, your discussion should really be about how to spend your money. You still need to have a life and enjoy it, but there are many different ways to do that – without spending more money than you make.
Crafts are an excellent way to help you stretch your money and enjoy life. Here are some ideas on how to do just that:
- Make it a party! Invite some friends over to do crafts together. Now, instead of going out and spending a lot of money, you're still getting together with friends and doing things together. It's also a great way to reduce stress because you're being social, laughing and not worrying about everyday problems.
- Make family memories. Start by getting everyone involved in a project they can all enjoy. Remember, spending time together is not about how much money you spend – it's about doing stuff together. Celebrate that time by putting together a scrapbook of all your projects. Take pictures of everyone while they're working and then take a group photo when you're finished the project. Print the pictures out and put them in a scrapbook where everyone can write down a few words. Now you'll be able to talk about the time you spent creating crafts together for years to come.
- Give meaningful gifts. When you make a gift yourself, it has more meaning than if you went out and bought it. Plus, it's cheaper than buying a similar item at a store. Anyone can buy something, but if you make something, it shows the other person how important they are to you. It doesn't matter how long it took to make or what it is; it only matters that you made it.
Thursday, February 12, 2009
Introducing Me!
Hi. My name is Joanne. I'm the owner of Beautiful Creations – a place where you can find all the craft supplies you need, plus original cross stitch patterns designed by me!
Growing up there was always someone I knew that was working on some type of craft project. My mother sewed quilts, knitted sweaters and even did a little bit of cross stitch. My grandmother knitted - I love the slippers she knits for me ... nothing else will do! So, it was just natural that I would ask my mom to show me how to knit and that I would go on to try many other types of crafts. As you can see, crafts have always been a part of my life.
Now crafts are an even bigger part of my life. I'm always working on some type of craft project. You can find some of these projects on my website, along with the instructions on how to do them yourself. I love sharing my crafty creations with everyone. That's part of the reason why I'm starting this blog. Here you can read about and see pictures of the latest craft project I'm working on, along with tips, the occasional product review and my thoughts about the latest business news in the crafting industry.
I also want to hear more from you. So, how have crafts been a part of your life?
Subscribe to:
Posts (Atom)